For many older adults, bunions and bunionettes can become a source of discomfort and hinder everyday activities. These common foot conditions can impact mobility and overall well-being, making it crucial to understand their underlying causes, symptoms, and available treatment options. Let’s delve into what these conditions entail and how you can find relief.
Anatomy of Bunions:

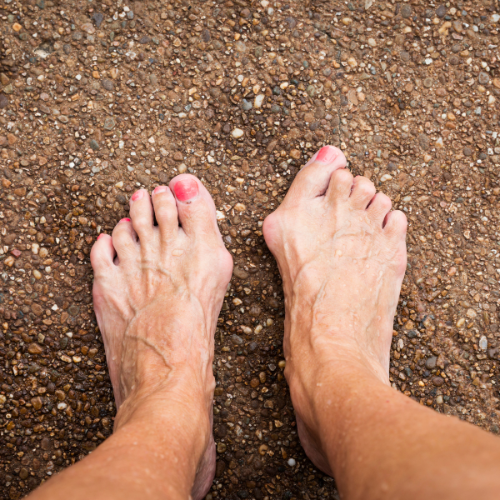
Bunions, medically known as “hallux valgus”, are bony bumps that form on the joint at the base of the big toe. This condition gradually forces the big toe to angle towards the second toe, causing the joint to protrude and become inflamed. Bunionettes, on the other hand, are similar bony bumps that develop on the joint at the base of the little toe.
Signs and Symptoms of Bunions:
- Visible enlargement or bump on the base of the big toe
- Swelling, redness, or soreness around the joint
- Limited movement of the big toe, leading to difficulty wearing certain shoes
- Persistent or intermittent pain, especially during walking or other weight-bearing activities
Potential Causes of Bunions:

Let’s start by getting one thing straight. Despite popular opinion, you do not have a bunion simply because it’s “in your genes”.
You may have an increase in joint laxity, which you can have a genetic predisposition for, but just because your mom had bunions doesn’t mean you have to as well.
Laxity in the joints, lack of proper foot strength, an injury or trauma to the foot, and wearing tight, narrow, or ill-fitting shoes that force the toes into unnatural positions over time can all contribute to the formation of bunions/bunionettes.
Conservative Treatment Approaches for Bunions:

While there are many blogs that will give you advice about wearing shoes with a wider toe box (which is a very good idea, by the way) and over-the-counter products, such as orthotic devices, bunion pads, or taking medications like ibuprofen or other nonsteroidal anti-inflammatory drugs (NSAIDs) to relieve pain and inflammation, in this article we want to stress the importance of one approach that is commonly overlooked.
Considering this a blog written by a PT, you may have guessed that treatment approach is EXERCISE!
Yes! That’s right! There are great, effective exercises you can do to improve your overall foot strength and help to improve the alignment in the feet.
While we still encourage getting shoes with a wider toe box and for some clients (not all) utilizing orthotic devices or pads, exercises that strengthen the foot can have a huge impact and often are not even considered, so make sure before opting for surgery you give foot exercises the ol’ college try!
Bunion Correction Options:
For individuals experiencing persistent pain and significant impairment in daily activities despite conservative measures, bunion surgery may be considered. This surgery aims to realign the affected joint and restore the normal position of the toe. Qualified candidates for bunion surgery typically include those who:
- Have severe pain or deformity that significantly affects their quality of life
- Do not experience relief from non-surgical treatments and continue to face mobility challenges
- Are in good overall health and do not have any underlying conditions that may pose risks during surgery
In Summary
Bunions and bunionettes can be a source of discomfort and may impact one’s ability to move comfortably. Understanding the signs, symptoms, and potential treatment options is crucial for managing these conditions effectively. By adopting preventive measures, especially foot exercises, and wearing appropriate footwear and seeking timely medical advice, individuals can alleviate discomfort and maintain an active lifestyle. Remember, consulting a qualified healthcare professional, such as a podiatrist and physical therapist is essential to determine the most suitable treatment plan based on individual needs and medical history.
Effective Exercises to Help Treat Bunions:
These exercises were taken from the Gaithappens.com. I highly recommend you check out their work!
Click HERE to see a video of Dr. Katie Landier, PT, DPT performing all of the exercises.
1. Toes Interlaced with Fingers:
This exercise can help alleviate excessive tightness on the top of the foot.
- Sit comfortably in a chair with your feet flat on the floor.
- Bend your knees slightly and bring one foot up to rest on your opposite thigh, allowing easy access to your toes.
- Use your fingers to gently interlace between your toes, starting from the base and gently working your way up.
- Ensure a gentle but firm grip, allowing your toes to relax into the space between your fingers.
- Rotate your foot in circles one direction 5 times and then rotate the other direction
- Release the interlaced fingers and gently massage your toes and the surrounding area to promote blood circulation and alleviate any tension.
2. “Lift, Spread, and Reach” Exercise:
- Stand with your feet hip-distance apart or sit comfortably in a chair with your feet flat on the floor, ensuring proper posture with your back straight.
- Keeping the ball of the foot on the floor, lift your toes upward, towards your shin.
- Spread your toes apart gently, feeling the stretch along the underside of your foot and the spaces between your toes.
- While keeping your toes spread, reach them outward towards the floor, trying to create length in each toe while keeping the spread of the toes
- Hold this position for a few seconds, then relax your toes back to their natural position.
- Repeat this lifting, spreading, and reaching motion for 8-10 repetitions, focusing on a smooth and controlled movement pattern.
Pen Taps for Abductor Hallucis:
- Stand or sit comfortably in a chair with your feet flat on the floor, allow for a fairly narrow space between the feet.
- Place a pen or a small, lightweight object on the ground between your big toes.
- Use the big toe of one foot to tap the pen, moving it sideways away from your other toes, then return it back to its original position.
- Repeat this tapping motion, aiming for a slow and controlled movement without lifting your heel off the ground.
- Perform 10-15 taps with one foot, then switch to the other foot, ensuring a smooth and consistent rhythm throughout the exercise.
Bunionette Exercise with Band:
- Sit in a chair and step on a resistance band so your little toe and the outer edge of your heel are on the band.
- Bring the other end of the band up so that your little toe is lifted by the band.
- Gently pull the band upward to create tension, while keeping your foot firmly planted on the floor.
- Press your little toe back down to the floor (you may need to adjust the resistance if there’s too much to allow for your little toe to move).
- With control, lift your little toe back up, trying to avoid the band just pulling it up.
- Repeat the exercise for 10-15 repetitions, ensuring a controlled and steady movement without causing any pain or discomfort.
Remember to approach these exercises gently and within your comfortable range of motion. If you experience any pain or discomfort, stop the exercise and consult a healthcare professional or a physical therapist for guidance.
Have the Strength to Live Life to the Fullest!
Please Remember to Subscribe and Check out our YouTube Channel!
Sources:
- Gaithappens.com (Gait Gurus membership)
- American Academy of Orthopaedic Surgeons. “Bunions.” OrthoInfo. https://orthoinfo.aaos.org/en/diseases–conditions/bunions
- American College of Foot and Ankle Surgeons. “Bunions.” FootHealthFacts. https://www.foothealthfacts.org/conditions/bunions
- This article was created with the assistance of Chat GPT
- All pictures created on Canva.com


